As we continue our research and compile our tips and tricks guides on how to properly mic specific instruments, let’s take a look at one of the most beautiful sounding instruments in the world. Firstly, digital pianos or even MIDI keyboards with realistic-sounding VST instruments have come quite a long way, especially in the last ten years or so as technology continues to evolve. Now more than ever, a quality digital piano or emulated virtual instrument sounds and feels exceptionally close to the real thing. That being said, audiophiles and musicians alike can still immediately tell the difference between digital and acoustic pianos. Even in a controlled environment, pianos can be especially tricky to mic and EQ. Here are some tips to consider to try and attain the best audio quality when recording an acoustic piano.
How to mic a piano
Grand or Baby Grand Pianos
Microphones by design try to interpret vibrations the same way our human ears do. There are several factors however that play into the tone of the piano once it reaches our ears. Think about a piano you’ve heard in a grand concert hall with tall ceilings on a large stage, and now think of a baby grand piano you’ve played in someone’s living room. Regardless of the quality of the instrument, a piano is going to sound radically different depending on the environment in which it is played. This is our first factor to keep in mind when you’re beginning to look into using a mic with a piano — where you’ll actually be playing it!
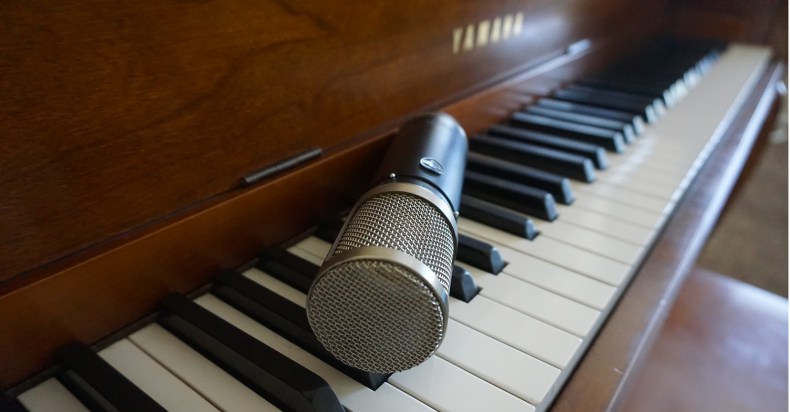
When recording a piano, typically multiple microphones are placed about 8” above the strings over different areas of the piano. If you have an accessible baby grand, trying having someone play it while you position your head over the strings and under the piano’s lid. This probably isn’t the tone quality you’re used to hearing when you listen to the piano.
If you’re in a controlled environment, the best option for recreating the most natural sound of the piano is the “Blumlein Pair”. To highlight at least a little history background, Blumlein is named after Alan Blumlein, an English electronics engineer, who invented this stereo recording technique that best recreates the spatial characteristics of the original instrument. It’s one of the most common ways to mic a piano and will be for quite some time, as many other musicians we’ve talked to will agree. The technique is based on using two bi-directional microphones positioned 90 degrees from one another as close to one another as possible, as shown in the photo.
This mic placement should give you a 360 degree image of the sound coming from the piano and the room. Before you start to record, double-check to make sure your microphones are picking up sound from both directions as some bidirectional microphones have a switch that toggles between one directional and bi-directional. Once you have the mics positioned correctly, you should wind up with a very natural sound. Feel free to experiment with the actual positioning before you get going on actually recording — it will all depend on your personal preferences and musical ear.
One of our favorite condensers to pair up for recording a grand or baby grand piano, specifically as a Blumlein Pair is the Rode NTK. You can also read our best condenser microphones guide for some options if you still need to purchase yours to begin recording or performing your piano.
Upright Pianos
Miking an upright piano on the other hand can be a little more difficult. Due to the construction of this instrument, you are not afforded the same amount of access to the strings and the source of the piano’s sound. The more compact size is typically seen as a benefit for storage and other personal preferences, however when miking it can call for some extra creativity.
The action (the point where the hammers strike the strings) on an upright piano is towards the top of the instrument. The soundboard is the back wall of the instrument and amplifies the strings the same way the top and bottom panels amplify an acoustic guitar. To save space, the high and low strings on a piano are layered diagonally across one another.
For the absolute best sound quality, you’ll need to undress the piano a bit. Remove the front cover of the piano, exposing the hammers and the tops of the strings. Place two large diaphragm condenser microphones about 8 inches off the instrument. Each microphone should be about one-third of the way in from each edge.
If disassembling the piano is not an option there are other ways to get a decent sound. Try placing your large diaphragm condenser mics about 10” off the back of the piano and halfway down the instrument. Remember, the strings cross each other in the middle of the instrument, so putting your microphones on the edges of the instrument will not make too much sense here. Place the microphones slightly more than a third of the way in from each edge. Also consider that the higher strings are much shorter than the longer and mid strings so you might want to place the microphone on the left side (when looking at the back of the piano) slightly higher than the microphone on the right side.
Employ these strategies and you should wind up with a decent sounding recording of your piano. If you have any further tips and tricks you feel we should include in this guide, please feel free to let us know in the comments. Additionally, any other questions you may have when it comes to using a microphone with a piano, please ask away!
Related Posts
- Microphone Recording Techniques for Popular Instruments
- How to Set up a Microphone with a Guitar Amplifier
- How to Microphone a Drum Set
 How to Set Up a Wireless Microphone System
 The Best Microphone for an Under $500 Budget
- The Top 10 Best Condenser Microphones in the World
- The Top 10 Best Tube Microphones in the World
- The Top 10 Best Microphones for Podcasting
- Blue Hummingbird Condenser Microphone Review
- Shure MV51 Large-Diaphragm Condenser Microphone Review
- Zoom SSH-6 Stereo Shotgun Microphone Review
- The Top 10 Best Audio Interfaces for the Money